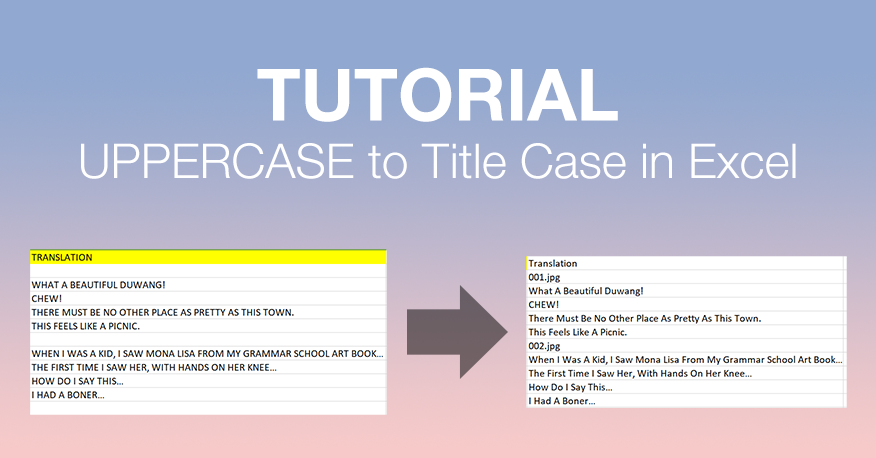
Here’s my quick tutorial on how to change uppercase to title case in Excel (and Sublime Text). A typical reason is to convert UPPERCASE English translations into corrected “I” for lettering or typesetting. We do this to prevent crossbar I’s from showing up on most fonts in the middle of words. (In most cases, companies are usually okay with crossbar I at the beginning of sentences)
Note: This only works with uppercase fonts! If you’re using lowercase fonts, you will have to google another method.

Nate Piekos (Blambot) on the proper use of crossbar I
1. In a new column in Excel, paste the formula below.
C1 is the English translation column, Blank cells are replaced with page number cell, SFX cells remain uppercase
=IF(C1<>"",IF(A1<>"SFX",PROPER(C1),C1),A1)

Formula pasted into D1
Apply to the entire column by dragging the lower right-hand corner (fill handle / autofill) down the entire column. The formula should be applied to each row now.

Result of applying formula to all cells
Stop here if you’re okay with everything in Title Case!
2. Then copy & paste formula column text to Sublime Text.
We will be correcting all cases of words that start with capital I. (eg. it, is, if, in)
Find and replace all I (‘ I’) with i (‘ i’) [must include space before “i”]. Before you hit replace all, double-check for any sentences that begin with “I” as most times it doesn’t need to be changed.
3. Paste entire corrected translation into new column
Keep the original translation in its column and make sure to only do this on a copy of the translated excel file.
Congrats! Hopefully this tutorial worked for you!
